 From time to time I become obsessed with changing my hair color. I blame the magazines for this obsession, as every page has a beautiful golden blonde or golden brunette that simply cries out my name. The problem with this obsession of mine is the fact that I have jet-black hair and going from black to anything light is simply not a simple task. I have done this a couple times already. This won’t be my first time delving into the unknown of hair lightening. I have gone from black to brown, black to blonde; only to go right back to black.
Why do I go back to such a dark and hard to lighten hair color? The answer is quite simple. I do so because I love the depth of black hair and it is easy to maintain without the need of a salon. If you get the right shade of black, one that is full of shine, it is stunning. However, it also makes me look pale and from time to time I simply get tired of it. My biggest setback when changing my hair color is accepting that in order to go from black to anything lighter, chances are I am going to be a redhead for the same amount of time.
Hair color rule number one is that if you go from black to anything not black, you will go red. Yes, you can bleach the heck out of your hair and try to skip this stage, but then you will also have very dry and damaged hair. So in order to change that black hair color and try to keep your hair’s integrity in place, you will have to be a redhead for a bit.
Last week I took the plunge! I went to the hair salon and announced my departure from black to a lighter hair color. My goal being a beautiful golden brown like Emilia Clark. I just saw her article in Elle Magazine and have fallen in love with the color. Her hair is the perfect mix of dark chocolate with light gold highlights. It is heaven and that exact color is my present goal. Will I be able to achieve that exact color? Who knows! Al I can do is try to get there and do so without damaging my hair too much. I am trying to be patient for the next month, until my next hair color appointment. At that time I will be ready to tweak the color a little more and see what happens. The month in between processing also allows me to apply as many hair treatments as I can at home to help get my hair back to its natural shine and health before processing it again.
Until then, I am a redhead and I must admit for the first time I am enjoying it. It doesn’t look terrible and it isn’t driving me crazy, at least not yet. Changing your hair color is much like becoming married! It is a big commitment and takes a lot of work to do it right. So be sure to do your research, get a lot of pictures of what you want and most importantly be realistic and open-minded. You may end up with something different all together that suits you even better than what you wanted, or you may end up going right back to your old color!
From time to time I become obsessed with changing my hair color. I blame the magazines for this obsession, as every page has a beautiful golden blonde or golden brunette that simply cries out my name. The problem with this obsession of mine is the fact that I have jet-black hair and going from black to anything light is simply not a simple task. I have done this a couple times already. This won’t be my first time delving into the unknown of hair lightening. I have gone from black to brown, black to blonde; only to go right back to black.
Why do I go back to such a dark and hard to lighten hair color? The answer is quite simple. I do so because I love the depth of black hair and it is easy to maintain without the need of a salon. If you get the right shade of black, one that is full of shine, it is stunning. However, it also makes me look pale and from time to time I simply get tired of it. My biggest setback when changing my hair color is accepting that in order to go from black to anything lighter, chances are I am going to be a redhead for the same amount of time.
Hair color rule number one is that if you go from black to anything not black, you will go red. Yes, you can bleach the heck out of your hair and try to skip this stage, but then you will also have very dry and damaged hair. So in order to change that black hair color and try to keep your hair’s integrity in place, you will have to be a redhead for a bit.
Last week I took the plunge! I went to the hair salon and announced my departure from black to a lighter hair color. My goal being a beautiful golden brown like Emilia Clark. I just saw her article in Elle Magazine and have fallen in love with the color. Her hair is the perfect mix of dark chocolate with light gold highlights. It is heaven and that exact color is my present goal. Will I be able to achieve that exact color? Who knows! Al I can do is try to get there and do so without damaging my hair too much. I am trying to be patient for the next month, until my next hair color appointment. At that time I will be ready to tweak the color a little more and see what happens. The month in between processing also allows me to apply as many hair treatments as I can at home to help get my hair back to its natural shine and health before processing it again.
Until then, I am a redhead and I must admit for the first time I am enjoying it. It doesn’t look terrible and it isn’t driving me crazy, at least not yet. Changing your hair color is much like becoming married! It is a big commitment and takes a lot of work to do it right. So be sure to do your research, get a lot of pictures of what you want and most importantly be realistic and open-minded. You may end up with something different all together that suits you even better than what you wanted, or you may end up going right back to your old color! Hair Treatments
Hair Treatments are a must when keeping your hair healthy, brilliant and smooth. Beautyvice offers you an extensive array of hair treatments for all air types. We offer treatments for fine hair, damaged hair, dulling hair and coarse and unruly hair. No matter what your hair concern may be, we have the perfect hair treatment for you. There is no need to spend hours at the salon and pay for costly one time treatments, when you can reverse damage, nourish and protect your hair easily and affordably at home. Beautyvice wants your hair to feel and looks its best, with the best hair care treatments on the market.
-
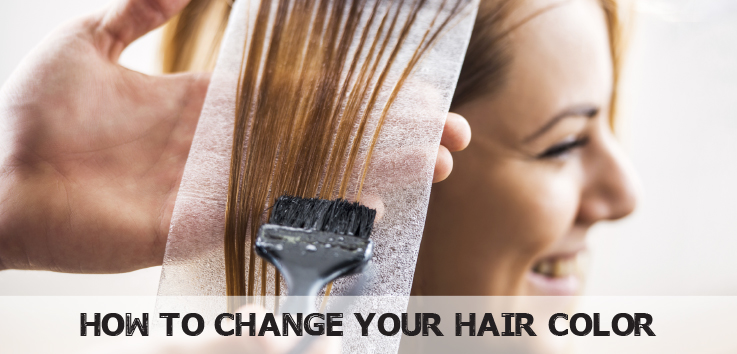
How to Change your Hair Color
From time to time I become obsessed with changing my hair color. I blame the magazines for this obsession, as every page has a beautiful golden blonde or golden brunette that simply cries out my name. The problem with this obsession of mine is the fact that I have jet-black hair and going from black to anything light is simply not a simple task. I have done this a couple times already. This won’t be my first time delving into the unknown of hair lightening. I have gone from black to brown, black to blonde; only to go right back to black.
Why do I go back to such a dark and hard to lighten hair color? The answer is quite simple. I do so because I love the depth of black hair and it is easy to maintain without the need of a salon. If you get the right shade of black, one that is full of shine, it is stunning. However, it also makes me look pale and from time to time I simply get tired of it. My biggest setback when changing my hair color is accepting that in order to go from black to anything lighter, chances are I am going to be a redhead for the same amount of time.
Hair color rule number one is that if you go from black to anything not black, you will go red. Yes, you can bleach the heck out of your hair and try to skip this stage, but then you will also have very dry and damaged hair. So in order to change that black hair color and try to keep your hair’s integrity in place, you will have to be a redhead for a bit.
Last week I took the plunge! I went to the hair salon and announced my departure from black to a lighter hair color. My goal being a beautiful golden brown like Emilia Clark. I just saw her article in Elle Magazine and have fallen in love with the color. Her hair is the perfect mix of dark chocolate with light gold highlights. It is heaven and that exact color is my present goal. Will I be able to achieve that exact color? Who knows! Al I can do is try to get there and do so without damaging my hair too much. I am trying to be patient for the next month, until my next hair color appointment. At that time I will be ready to tweak the color a little more and see what happens. The month in between processing also allows me to apply as many hair treatments as I can at home to help get my hair back to its natural shine and health before processing it again.
Until then, I am a redhead and I must admit for the first time I am enjoying it. It doesn’t look terrible and it isn’t driving me crazy, at least not yet. Changing your hair color is much like becoming married! It is a big commitment and takes a lot of work to do it right. So be sure to do your research, get a lot of pictures of what you want and most importantly be realistic and open-minded. You may end up with something different all together that suits you even better than what you wanted, or you may end up going right back to your old color! -
How to Get Healthy, Strong Hair
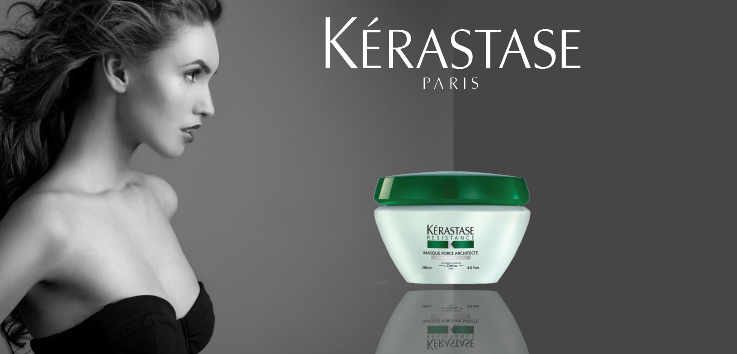
From time to time our hair needs a boost of protein, strength, and shine. Kerastase Resistance Force Architecte Reconstructing Masque is the perfect hair treatment to help boost our hair's overall health. We all know that weekly hair treatments are the cornerstone to healthy hair. With the variety of choices out there, you certainly have the opportunity to maintain your hair beautiful without having to pay salon prices.
When choosing a hair treatment you should look at certain variables. Factors such as hair type and hair concerns are important. This is why Kerastase Resistance Force Architecte Reconstructing Masque is a great choice, it is perfect for everyone. This amazing protein rich masque helps to rebuild you hair cuticle. The perfect choice for those who chemically treat their hair. It also delivers increased shine and elasticity. This means that even if you heat style your hair often, your hair is protected. Kerastase Resistance Force Architecte Reconstructing Masque leaves your hair strong. It helps to keep split ends at bay. Enhances your hair's natural shine and creates a smooth finish.
No matter what your hair concern is, Kerastase Resistance Force Architecte Reconstructing Masque will meet your needs. This masque is everything you need for healthy hair every day. To use, all you need to do is shampoo your hair first. You can shampoo with any shampoo of your choice. After shampooing your hair, towel dry it until it's about 80% dry. Next apply the masque from roots to ends. Get a wide toothed comb and comb the masque through your hair. This assures that you spread it evenly throughout your hair. Leave it on for at least 15 minutes and then rinse well. If you have the time leave on for 30 minutes and apply a little heat with your blow dryer. The heat helps the masque penetrate even more and enhances shine.
Do this at least once a week. If you have just had your hair colored, or had any other chemical treatment, apply the masque as well. Kerastase Resistance Force Architecte Reconstructing Masque will become your hair's new best friend. It guarantees stronger and healthier hair that is more resilient each time.
Find Deals on Haircare Products at Beautyvice.com.
-
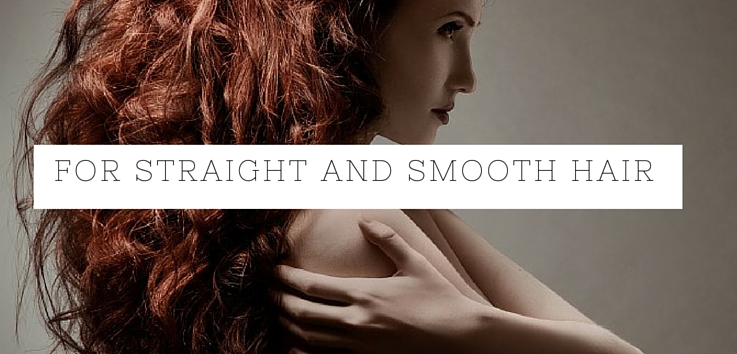
How to use Liquid Keratin
One of our favorite keratin treatments is the Liquid Keratin 30 Day Straight Smooth & Long Treatment Starter Kit. The reason we love this product is because it offers an extremely user-friendly, no way to mess it up kit that brings absolutely everything you need for beautiful and smooth hair. Liquid Keratin 30 Day Straight Smooth & Long Treatment Starter Kit is an all inclusive keratin treatment kit that offers you brilliant, strong and frizz-free hair for up to 30 days.Yes, this is not as long as the average keratin treatments last, however it is a friendlier, easier to use and non-formaldehyde formula that you can use at home without having to worry about smells, fumes, or messing up and having spent a ton of money on a product.
Included within this kit are a liquid keratin shampoo, conditioner, treatment, and leave in conditioner. Used together these products offer you smooth and beautiful hair that stays frizz free for 30 days without the use of formaldehyde. The best part is, you continue to use the shampoo, conditioner and serum for those 30 days, helping to maintain your hair. The kit contains a 30-day treatment (that should last for at least two months if not more) 4.2 oz., Liquid Keratin Shampoo and Conditioner each 1.7 oz. and Leave in Conditioner 1.7 oz.
The Liquid Keratin 30 Day treatment is ridiculously easy to use. Below are the steps on how to apply the treatment and maintain it for 30 days.
- Shampoo your hair with the Liquid Keratin Shampoo. Shampoo two times.
- Towel dry your hair and do NOT use the conditioner.
- Apply the treatment by spraying it throughout your hair from roots to ends. We do suggest you section off your hair and apply this way assuring that you saturate the hair evenly. Mind you, by "saturate" we do not mean that the treatment should be dripping off your hair. Your hair should be damp with the treatment, not drenched.
- Once you have applied the treatment throughout your hair comb through your hair to help distribute the product evenly. Use a wide toothed comb so that there is minimal pulling. We love the Mason Pearson Rake Comb. It is perfect for styling and detangling without pulling and breaking your hair.
- Now that you have applied the treatment, start blow drying your hair section by section. The more smooth you dry it, the smoother it will remain. For this reason it is important that you take your time and dry it well.
- Lastly, flat iron your hair. You do not have to worry about passing the iron 5 times over each piece like you would with a regular keratin. Remember, this kit offers smooth hair with a milder form of keratin that is absolutely non-toxic. Do make sure you use a flat iron that heats up to 450 degrees.
Once you are done, wait at least a day until you wash your hair again. You can wash normally at this point, using both the keratin shampoo and conditioner included within this kit. Also, apply the leave in before styling your hair to help guard against heat damage and increase smoothness. Liquid Keratin 30 Day Kit offers you a great option for at home smoothing at a fraction of the price and with absolutely non-toxic ingredients!
-
How to Apply a Hair Mask
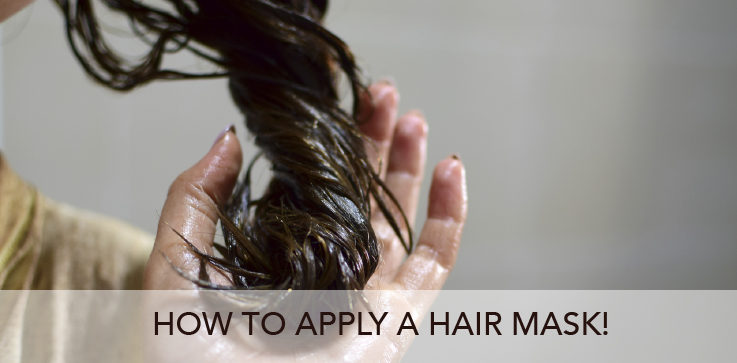
At least once a week we all need to take the time to apply a good hair treatment to help repair, nourish and enhance our hair. It doesn't matter what type of hair you have, there is a hair mask just for your hair concern. You could want to add shine to your hair, replenish moisture, repair your hair after a chemical treatment or protect your hair color from fading. The good news is there is no need to go to a salon in order to have a hair treatment anymore. All the salon treatments are easy enough to use at home with the same success at a fraction of the cost, all you really need to do is understand how to apply a hair mask like the pros do at the salon.
The first step when applying a hair mask is to wash your hair. Shampoo your hair as you would normally. Once you have washed your hair your next step is to towel dry your hair really well. You never want to apply a hair mask (or conditioner) to very wet hair. The reason for this is that the excess water in your hair will simply keep the mask from being thoroughly absorbed. Water does help your hair absorb conditioner, but not when it is soaking wet. This is why at the salon, even before they apply conditioner they do strain most of the water from your hair.
Once your hair is towel dried, you can go ahead and apply your hair mask from roots to ends. After having applied the mask, grab a wide toothed comb and run it through your hair to make sure the hair mask is dispersed evenly throughout your hair. Never use a thin toothed comb as it may pull your hair and cause damage. A wide toothed comb will go through your hair more easily and not cause pulling or breakage.
Once you have combed the hair mask through your hair, leave it on for at least 15 minutes. If you have the time, 30 minutes is optimal. This allows the mask to truly be absorbed into your hair shaft. If you want to get even more creative, simply put a shower cap on your hair and apply heat with your blow dryer. Heat also helps with absorption and adding shine and smoothness to your hair.
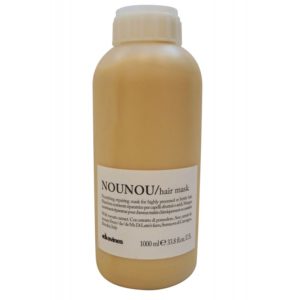
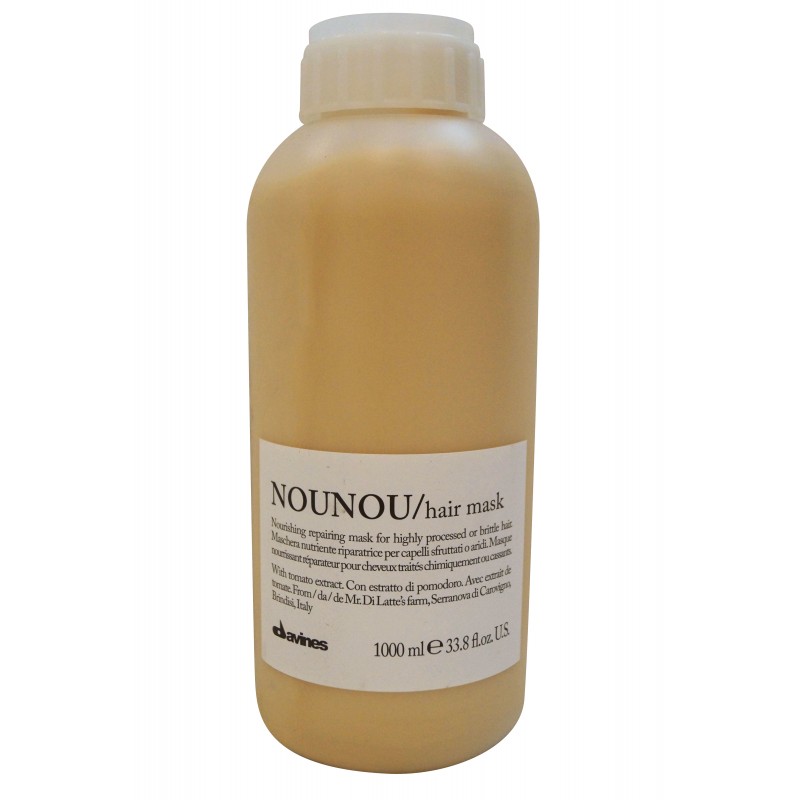
After 15-30 minutes you simply wash off the hair mask and voila! Your hair will truly be transformed. One of our favorite hair masks is Davines Nounou Hair Mask. This formula is made for those with bleached hair but works well for all types of hair. This is a shine enhancing, moisturizing and replenishing mask that simply leaves your hair full of shine, soft to the touch and beautiful. It is a must try for anyone that wants brilliant and smooth strands.
Next time you want to revive your hair, skip the salon visit and try the techniques above for a salon quality hair treatment. Knowing how to apply a hair mask is simple and will make a huge difference in your hair daily appearance.
-
How to Apply a Keratin Treatment
 One of the top searches right now on the web is for Keratin Treatments! Yes, believe it or not, the Keratin Treatment is hot right now and it is so because it is so "hot" outside. While the heat continues to rise, the rain falls and the humidity starts to attack our hair, we are all running out to get a keratin treatment in hopes that we can tame our unruly hair for the next few months and salvage our beauty under extreme heat and humidity.
If you have ever had a keratin treatment you know that it is not only costly, but it takes a very long time, something that many of us simply do not have. For this reason we are here to save the day and explain how you can get the same professional-grade results in the comfort of your own home for a fraction of the price.
Let's start with the tools you need. Of course, you will need a good keratin treatment! We really like Keratin Complex Natural Smoothing Treatment Keratin Complex Smoothing Treatment. This product is used in salons throughout the United States and everyone loves how it works. We also really like that the brand offers everything you need to apply the treatment and maintain it. You will need a clarifying shampoo such as Keratin Complex Clarifying Shampoo. This shampoo will help prep your hair for the treatment. The clarifying shampoo removes all product buildup and stripes your hair so that it is able to absorb the keratin treatment better. You will need a flat iron that heats up to 450 degrees; we are excited to soon be offering the Theorie flat irons that allow you to digitally program your temperature, perfect for this treatment. Lastly, you will need a Keratin Shampoo and Conditioner such as Keratin Complex Keratin Care Shampoo and Conditioner to maintain your treatment between washes.
Now that you have all the tools you need let's get started with the how to process! Before applying your Keratin Treatment you must wash your hair at least twice with a clarifying shampoo. Yes, this will leave your hair a bit dry, but it is necessary in order to prep your hair for the treatment. Once you have washed with the clarifying shampoo twice, go ahead and comb your hair and blow dry it. DO NOT add any other product to your hair. Do not condition your hair, do not add a heat styling product. Your hair must be absolutely naked when you apply the keratin treatment to it.
Once you have dried your hair without conditioner or styling products, you are ready to begin the treatment. Section your hair off into 4 sections to make it easy. Start at the bottom and work your way to the top. Wear gloves and you may want to open your bathroom windows as it may get smokey! Apply the treatment from roots to ends. You are basically saturating your hair in the keratin treatment. Once you have applied the treatment to your entire head, it's time to sit under a dryer. If you do not have a dryer try putting on a shower cap and applying heat with your blow dryer for about 30 minutes. This will allow the treatment to truly absorb into your hair shaft.
Once you have finished this process you are ready to blow dry and flat iron. This part is very important! Section your hair again into parts and blow dry in sections. Once you are done blow drying a small section flat iron in at 450 degrees. You must pass the iron from roots to ends at least 4 times! Do this for your entire head. When you are done simply leave your hair alone! Do not wash it or adds bobby pins to it for the next 2-3 days. This is the time you allow your hair to continue to absorb the treatment.
Your hair may feel a bit stiff and not look soft for a day or so, however once you wash your hair it will be beautiful, smooth and full of shine! Keratin treatments do work and they are a wonderful way to tame frizz and unruly hair! If you want to try it at home, it is still timely, but a lot less costly.
One of the top searches right now on the web is for Keratin Treatments! Yes, believe it or not, the Keratin Treatment is hot right now and it is so because it is so "hot" outside. While the heat continues to rise, the rain falls and the humidity starts to attack our hair, we are all running out to get a keratin treatment in hopes that we can tame our unruly hair for the next few months and salvage our beauty under extreme heat and humidity.
If you have ever had a keratin treatment you know that it is not only costly, but it takes a very long time, something that many of us simply do not have. For this reason we are here to save the day and explain how you can get the same professional-grade results in the comfort of your own home for a fraction of the price.
Let's start with the tools you need. Of course, you will need a good keratin treatment! We really like Keratin Complex Natural Smoothing Treatment Keratin Complex Smoothing Treatment. This product is used in salons throughout the United States and everyone loves how it works. We also really like that the brand offers everything you need to apply the treatment and maintain it. You will need a clarifying shampoo such as Keratin Complex Clarifying Shampoo. This shampoo will help prep your hair for the treatment. The clarifying shampoo removes all product buildup and stripes your hair so that it is able to absorb the keratin treatment better. You will need a flat iron that heats up to 450 degrees; we are excited to soon be offering the Theorie flat irons that allow you to digitally program your temperature, perfect for this treatment. Lastly, you will need a Keratin Shampoo and Conditioner such as Keratin Complex Keratin Care Shampoo and Conditioner to maintain your treatment between washes.
Now that you have all the tools you need let's get started with the how to process! Before applying your Keratin Treatment you must wash your hair at least twice with a clarifying shampoo. Yes, this will leave your hair a bit dry, but it is necessary in order to prep your hair for the treatment. Once you have washed with the clarifying shampoo twice, go ahead and comb your hair and blow dry it. DO NOT add any other product to your hair. Do not condition your hair, do not add a heat styling product. Your hair must be absolutely naked when you apply the keratin treatment to it.
Once you have dried your hair without conditioner or styling products, you are ready to begin the treatment. Section your hair off into 4 sections to make it easy. Start at the bottom and work your way to the top. Wear gloves and you may want to open your bathroom windows as it may get smokey! Apply the treatment from roots to ends. You are basically saturating your hair in the keratin treatment. Once you have applied the treatment to your entire head, it's time to sit under a dryer. If you do not have a dryer try putting on a shower cap and applying heat with your blow dryer for about 30 minutes. This will allow the treatment to truly absorb into your hair shaft.
Once you have finished this process you are ready to blow dry and flat iron. This part is very important! Section your hair again into parts and blow dry in sections. Once you are done blow drying a small section flat iron in at 450 degrees. You must pass the iron from roots to ends at least 4 times! Do this for your entire head. When you are done simply leave your hair alone! Do not wash it or adds bobby pins to it for the next 2-3 days. This is the time you allow your hair to continue to absorb the treatment.
Your hair may feel a bit stiff and not look soft for a day or so, however once you wash your hair it will be beautiful, smooth and full of shine! Keratin treatments do work and they are a wonderful way to tame frizz and unruly hair! If you want to try it at home, it is still timely, but a lot less costly.
Find Deals on Keratin Hair Products at Beautyvice.com.